Tuesday 18 November 2008

AWI Terrain

Over a number of years I have built some specific terrain for the rules so for those who have expressed an interest here they are.
Firstly a modular range of fortifications. The original items were supplied in resin by Marbeth (I think) and the straight run of gabions had 11 gabions in it. To fit with my 45mm base sizes I cut of the end gabion to make a double length (rear) and then in half to provide a single length (front). I then used a pair of spare gabions to create a gun embrasure with matchstick timbers on the inside and the "earth" built up from plastic padding car repair kit with kitty litter mixed in to give bulk and texture.
Right angle bends were made with 6 gabion lengths using the filler to round off the ends

The buildings are constructed to a standard size of 50mm by 100mm on a 60mm by 120mm base. This size allows a full unit of infantry to drop neatly into the building. If it wasn't for the flag then the roof would fit back on again. I have one double sized building, which will hold two units and is made in the style of a colonial mansion.

The basic construction for most small buildings was a thin card template, glued onto a MDF base. Door and window surrounds were added from matchsticks A chimney was added from balsa and textured with tetrion. Then strips of thin card were glued onto the structure overlapped to give a clapboard effect. The roofs were made similarly with card shingles/tiles. The barn containing the figures was made out of "Wills" wooden panel plasticard. The mansion is more substantial and built out of foamcore with commercial window frames.

Will
Tuesday 4 November 2008

Long Island Game - Eye Candy

Lots of nice pictures of the Long Island game involving Giles Allison...... link

Looks and sounded like great fun

Will

Friday 17 October 2008

Bemis Heights (4) - Play Test

It's been a while since I wrote the scenario and last night we played it down at the Club. Paul took the British And I took the Americans. I found a few minor glitches and I'm now clear about the relative victory conditions so I'll update the relevant sections over the next day or so.

Commentary

The Britsh formed up to try and observe the America positions blocking the road to Albany. All was quiet for a while (no American units appeared on move 1) Then Poor's brigade appeared in the trees on the British left, while Morgans men moved through the woodland on the British right. Poor's brigade immediately suffered from the opening rounds from the British cannons, the result from this and subsequent rounds of fire meant that the brigade didn't emerge from the wood line until later in the game. Then over on the right Morgans men appeared at the wood edge but Dearborns came under fire from the cannon attached to the British light infantry. The rifles began to snipe at the British lights in return but the action stalled on this flank as well. Learned's brigade emerged from the trees to attack the centre of the British line but failed to make any headway against the solid German line.

When Ten Broek's militia arrived down the road the British were quite confident and commenced a steady withdrawal back towards their lines. (The British were not permitted to withdraw until the militia arrived).

Pressure was then built up on the British left and centre with the American weight of numbers beginning to tell. It culminated in Poor's brigade attacking from a flanking position and eventually starting the roll up of the British line from the left, although Acland and his grenadiers did a sterling job in holding them up. A wider turning move by the 1st Conn Militia suffered badly by drifting into the firing arc of all the guns in the Breymann and Balcarres redoubts.

On the British right Fraser conducted a steady withdrawal, the lights exacting a toll on Morgans rifles when they rashly charged into close combat.

Time was called after move 13 and on balance the game was progressing reasonably close to history. The Grenadiers did better than reality, but they didn't try charging the rebels. The guns were quite influential, perhaps explaining why they were taken on the reconnaissance. But they would mostly have been lost as actually happened so a mixed blessing? Morgans brigade was less effective than anticipated. The guns kept Dearborns pinned down so the rifles didn't have the numbers to drive off the British Light Infantry on their own. In retrospect as the American player I should have sent Morgans further round the British flank before emerging from the woods, and a similar action with Poor's brigade on the other flank would have been equally beneficial.

Overall a good game.

Further Analysis

Looking at the status of the units after the game, the British had only lost 17sp out of the 50sp in their forward line, but the losses were heaviest in the Grenadiers 4sp and across the artillery 9sp. The Americans had suffered far worse with 47sp lost, Poor's brigade had lost 50% (17sp out of 35) and Learned's 70% (14 out of 20) both showing the effect of the artillery fire. Morgan's losses of 40% (6 out of 15) reflected the results of trying to melee with the British light infantry.

Sunday 21 September 2008

Gloucester Point break-out 1781

Work in progress - comments please

A nice what-if game. On the night of 16-17th October 1781. Cornwallis attempted to move his force across from Yorktown across to Gloucester Point to break out of the siege. Unfortunately the weather deteriorated and the rest is history. But what if the operation went ahead? The British have to break out within a time limit before the main American/French army could react and block their escape route.

British Forces

In Gloucester Point
Hessian Von Bose 1x 5sp
British Legion (Dragoons) 2 x 5sp
Queens Rangers (LI) 1 x 6sp
Artillery (6/12pdrs) 20 guns in 3 fixed batteries?

1st Wave arrives move 2
LI Abercrombie (LI) 4 x 5sp
Guards O'Hara 2 x 5sp

2nd Wave arrives move 4
Yorke 17th/23rd/33rd/71st Foot 4 x 4sp

3rd Wave arrives move 6
Dundas
Erbprinz 2 x 4sp
43rd/80th Foot 2 x 6sp
NC Volunteers 1 x 2sp

French/American

Weedon - Virginia Militia 6 x 5sp (Mercers unit is veteran militia)
Dabney State Legion 1 x 4sp

Lazuns Legion
Infantry 1 x 5sp
Cavalry 2 x 5sp
Guns?

Choisey
French Marines 4 x 4sp
Guns?

Deployment, etc.

I'm trying to find details of the terrain outside of Gloucester Point. Certainly to the east is the "Cedar" swamp blocking movement in that direction

Wednesday 3 September 2008

Revolutionary Route

Just discovered a very nice collection of pictures by the New England historical artist David R Wagner covering the French forces under Rochambeau in the Americas. Nice ideas for vignettes, etc.

http://www.davidrwagner.com/revolutionaryrouteseries.htm

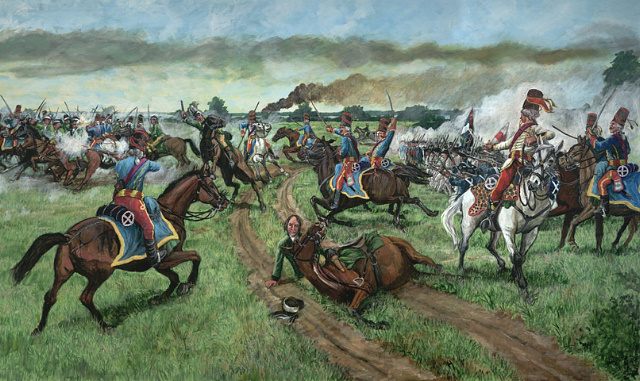
Just a taster with Lauzun's legion in combat against Tarlton

Thursday 14 August 2008

Ebenezer Learned's brigade 1777

Now for my brigade to be used at Bemis Heights. I mentioned on my main blog that I would depict the brigade of Ebenezer Learned comprising the 2/8/9 Massachusetts and 1st Canadian.


Clockwise starting from from the left
2nd Mass - as described in Lefferts, etc very much standard uniform except for Brown breeches
8th Mass - I used the picture in Mollo (#105) as the basis. I agree with comments that it may have been just one company, but it makes a very striking unit
9th Mass - No clear description, so I depicted another Mass regiment Glovers Marbleheads (14th Cont.), which looks very similar to the unit attacking the Breymann redoubt in the Osprey Saratoga book
2nd Canadian - rather than the 1st this unit saw more action, more clarity on the uniform so I copped out.

Flags - All generic Massachusetts flags, except the 2nd Canadian which came from Warflag

I also added a couple of extra generals by converting some Revell American Militia, one is clearly formally dressed, except he is missing his hat, and the other I will use with one of my militia brigades.
Finally, here is the very useful response from Brendan Morrisey on the Lace Wars group when I queried the 1st Canadian Uniform.

"The situation with much of the Northern Army in the summer of 1777 was that very few units were issued uniforms of any sort prior to the Saratoga campaign, most only receiving their 1777 issue clothing in November and December. So the short answer to your question is that you could probably use a militia unit with a few uniformed officers for Livingston's regiment.

To take the regiments of Learned's brigade:

2nd Mass. Several deserters were recorded wearing blue coats/short jackets, so there may have been a uniform of sorts, possibly worn by men who had re-enlisted from 1776 and were wearing old uniforms from other units. The first recorded issue of clothing to the regiment itself, was in December 1777 and included a large amount of green and red cloth (suggesting green-faced-red).

8th Mass. This unit was issued with 60 coats and similar numbers of waistcoats and breeches, but also 238 hunting shirts, some time between February and August (they were very much the exception). In the early years of the war, h/shirts were issued in pairs (ie each recruit got two), but more likely the 8th were given one each because of shortages

9th Mass. They got exactly 18 sets of coat/waistcoat/breeches,which I would suspect were issued to the sergeants. The rest of the unit would have been wearing "civvies" - ie, they'd look like militia.

1st Can. Because the Canadian regiments had no "home" State, they were often overlooked when it came to clothing and equipment (IIRC,Hazen had to bang the table a few times to get Congress to kit out his own regiment, the 2nd) and I suspect a lot of them were wearing their own clothes. From the assorted deserter reports listed in an earlier post, it sounds like the two men wearing the captured British coat and the blue coat faced red, were in the the "official" uniform( probably one was a musician and hence was in reversed colours - my money's on the guy in the British coat). The other two men were probably wearing their own clothes, and therefore may have been new recruits. A consignment of British coats was "liberated" from the7th and 8th Foot (dark blue facings) and 26th Foot (yellow) during the invasion of Canada in 17775-76, and the deserter above could well have been wearing one of these - quite likely a 7th/8th Foot coat.(Before his death, Montgomery had a spat with Congress over British coats, as the latter wanted him to take away all prisoners' coats and he had to explain that only un-issued coats could be taken as spoils of war, as the British soldiers paid for their uniform, so the coats they were wearing were private property and so could not be confiscated.)

Hope that helps."

Will

British army on parade

Finally on parade, the largest army, the British plus their German contingent, quite a lot when just laid out.


My original British wing, light infantry (Airfix nap French conversions) and Grenadiers in the front rank, the next two with Washington's army figures repainted as British. Then in the rear two British Grenadier figures used as Fusiliers and with a hat swap as line infantry. The guns used to be from Airfix Nap French Artillery set, but I upgraded them with the much nicer guns from the Revell SYW artillery

The German wing, front rank are Brunswick Grenadiers (Bearskin shaved down to give a mitre), second and third rank are the oldest figures in my collection the Brunswick regiments Von Rhetz and Von Specht (originally painted for the Bath wargames club Saratoga campaign) in the rear two ranks the Hessian contingent and accompanying jagers. The single gun is Hessian.

My newer forces, added to meet the needs of various scenarios. ACTA Light Infantry in the front rank (nice figures but rather slender) Second rank is a Revell/Accurate figures line regiment, plus a number of Piquettes (I use them in games at 1 strength point). Third rank are some upgraded Grenadiers (I gave them flags just for appearances). Fourth rank are Airfix Nap Highlanders with cut down bonnets to look vaguely AWI'ish. Rear rank is more Revell/Accurate figures painted as Loyalists. To the right is another foot guns and some Naval guns and crews for holding fortifications, etc.

The cavalry, light dragoons to the front, British Legion behind, in both bodies the first unit is the earlier painting. To the right of the cavalry is the Hessian Grenadiers. To the left is Tarleton posing!

That's almost the whole army, I do have the Italeri Light Dragoons, but they get used with my heavier British cavalry for the SYW.

Once again, I can see the need for quite a bit of remedial work.

Will

Wednesday 13 August 2008

French Army on parade

Now for the French, like the Americans parts of the army are over 30 years old and has gradually grown since then. The early army was a simple force of 3 units of infantry (back then my European battalions were 24 figures strong), with the new rules they became 6 but little changed until the Revell SYW figures appeared, at that point I added quite a number of new units rounding off the force so it could fight stand-alone actions. It is also used for the SYW.

The entire army

Front two ranks of infantry are the two units of Saintogne units (depicted as grenadiers) and four units of Soissonais, Third and forth ranks are Deux-Ponts, Grenadiers de France (Naval Infantry in the Americas) and Dillon. The final rank is Canadian Militia so actions from the French & Indian Wars can be fought.

Right Flank

Shows one unit of light infantry from Lazun's Legion, one of the two guns behind is also from the Legion, if necessary the Deux Ponts can act as close order infantry of the Legion. The unit on the other flank is the Chasseur-Voluntaires de Sainte-Dominge.

Left flank

Although most generals are from the Airfix AWI sets, some SYW command figures were added.

Lazun's Legion cavalry led by the Duke

Except for the Duke they are Airfix conversions, If I get around to adding more I'll use the excellent SYW Hussar figures like the Duke, who just has a head swap.

As with the Americans the problem with carrying out this review is the highlighting the deterioration of quite a few figures. I never quite notice when playing as the lighting is usually quite dim.

Looks like I've got a project to tidy up all my AWI armies.

Will

Missing American Cavalry

After publishing the American army I spotted that my two newer cavalry regiments were missing, so here they are in the front rank. They are the 3rd (Baylors) and 4th (Moylans) Continental Dragoons


Those who use plastic figures will recognise them as the limber outriders from the Airfix Napoleonic British RHA set. The older units were converted from the AWI British grenadier officer. The units are the 2nd (Sheldons) and 1st (Blands) Continental Dragoons

Will

Sunday 10 August 2008

AWI Brigade for the southern campaigns 1781

Just completed some new figures to use in my Southern battles of the AWI. It's a combined brigade comprising Huger's (1st & 2nd Maryland) and William's (4th & 5th Virginia) brigades. Like all my continental regulars I depict them in a common uniform, which is not correct, but it's the way I started in the period over 30 years ago and it makes it easy to identify the units. The flags came from two sources Warflag for the 1st MD, and Dansk Figurspilsforenings (see downloads) for the 2nd MD and Virgina flags. The latter were adapted slightly using MS paint to give different background colours.


The Maryland regiments (front rank) are very much as documented, but there is much less on the Virginia regiments (rear rank), so I depicted the 4th in the standard continental uniform for Virginia and the other I used artistic license and copied the uniform used in Tarltons Quarter for the 10th Virginia (link)

As my basing seemed quite varied (link) I decided to keep to my current style although it's more effort.


Will

Monday 4 August 2008

American army on parade

Having seen the 4th of July parade over on Tarletons Quarter, I felt inspired to do the same. Many of the figures are over 30 years old and are showing signs of wear, in particular the dreaded yellow bayonet disease, or in this case yellow muskets.

Overview of my current force with rifles/lights in the first rank, continentals and artillery in the second, militia in the third and most of the fourth. Finishing with cavalry in the rear. The majority of the figures are Airfix with a number of Revell/Accurate figures for the rifles and some militia


The right flank, rifles leading, followed by my oldest brigade the 1st-4th New York regiments (painted for the Bath Wargames Club's Saratoga campaign in the early 70s) followed by a militia brigade and then a small mixed brigade of the Lafayette Light Infantry and two regiments of militia.


The left flank, rifles followed by the additional continental regiments of Webb, Lee, Hartley and Sherburne (nearly as old as the New Yorkers) then militia brigade using Airfix figures and then one using Revell/Accurate figures.

My CinC stand (Washington look alike?) using SYW figures

The frightening part is seeing the variety in the basing of the units, I have been so used to just playing with the units, I had forgotten how varied and tatty they had become. I'll need to put some time aside to tidy them up.

Will

Tuesday 15 July 2008

Bemis Heights (3) - Terrain & Objectives

Final update 20th October 08

The British were drawn up in line on ridge covered by a wheatfield overlooking the middle creek. The open ground was 1000m, which was wider than the British could cover. At my normal scale 1 foot (300mm) represents 250m so the open ground extends 4 foot with woods on either side, a nice fit to a 6 foot wide table. The American table edge represents the middle creek. The top of the ridge is about 15" from the creek, so providing enough room for the Americans to move on without immediately being under musket/rifle fire.

One plan I have shows the area behind the British line as completely wooded, but I others show more open areas. The roads in the open have no effect on movement. Codes on the bottom of the map relate to the American arrival points.

To the British left rear are the Balcarres and Breyman redoubts with the cabins (only one depicted) in between.

Treat the forests as open woods


Useful battle map from the Library of Congress

Objectives

American: To drive the British off the table - for victory in the game they must drive the British back into their half of the table and capture at least one redoubt within 20 moves.

British: They must remain at or in front of their starting positions up until move 5. Victory for the British player is holding both redoubts and causing at least double their own losses on the Americans.

Monday 14 July 2008

Bemis Heights (2) - American OOB

Final update 20th October 08.

Basic data comes from a number of sources, including Novak, Boatner, Morrisey, etc. The standard calculation is 50men = 1sp (Open Order 25:1), however for playability the strength points in some brigades don't add up to the overall strength.

Morgan's Brigade (500) arrives turn 1/2 (1) - deployed between A and B

  • Virginia Rifles #1 5sp OO
  • Virginia Rifles #2 5sp OO
  • Dearborn Light Infantry 5sp (2)

Poor's Brigade (1,500) - arrives turn 1/2 (1) - deployed between E and F

  • 1st NH 5sp
  • 2nd NH 5sp
  • 3rd NH 5sp
  • 2nd NY 5sp
  • 4th NY 5sp
  • 1st Conn Militia 5sp Militia
  • 2nd Conn Militia 5sp Militia

Learned's Brigade (1,400)- arrives turn 3 - deployed between C and E

  • 2nd Mass 5sp
  • 8th Mass 5sp
  • 9th Mass 5sp
  • 1st Canadian 5sp

Ten Broek's Militia Brigade (1,250) - arrives turn 5 on the road at E in column

  • Although actually ten regiments strong deploy on table at 5 x Militia regiments each 5sp

Patterson's Brigade (1,800) - arrives turn 7 on the road at E in column

  • 10th Mass 5sp
  • 11th Mass 5sp
  • 12th Mass 5sp
  • 14th Mass 5sp
  • Mass Militia 2 x 5sp

Glover's Brigade (2,100) - arrives turn 9on the road at E in column

  • 1st Mass 5sp
  • 4th Mass 5sp
  • 13th Mass 5sp
  • 15th Mass 5sp
  • 2nd Albany Militia 5sp Militia
  • 17th Albany Militia 5sp Militia
  • Duchess & Ulster Militia 5sp Militia

Benedict Arnold is treated as the overall comander, he arrives on turn 3. Each move roll 2d6, if the score is 11 or 12 he is recalled by Gates and takes no more part in the battle.

Notes

1) One brigade will arrive on move 1 the other on move 2, dice for which arrives first
2) Alternatively Dearborns can be deployed as two open order units each 5sp

Bemis Heights (1) British OOB

Final update 20th October 08

Basic data comes from a number of sources, including Boatner, Ketchum, Morrisey, Novak, etc.

The British force that marched out on 7th October 1777 was very much a reconnaissance in force rather than the full scale offensive that Burgogne had originally proposed to his council of war.

The OOB is for my rules notes are shown as (#)

Right flank - Fraser

  • Light Infantry #1 5sp OO (1)
  • Light Infantry #2 5sp OO (1)
  • Royal Artillery (medium guns) 3sp
  • 24th Foot 5sp
Centre - Riedesel (2)

  • Brunswick Grenadiers 5sp
  • Von Specht 5sp
  • Von Rhetz 5sp
  • Hesse Hanau Artillery (medium guns) 3sp
  • Royal Artillery (heavy guns) 3sp
Left - Acland

  • British Grenadiers 5sp
  • Royal Artillery (medium guns) 2 @ 3sp
Other forces:
Breyman redoubt (3) - Breyman (8)

  • Breymann d3+2sp (4)
  • Hesse Hanau Artillery (medium guns) 3sp
Balcarres redoubt (5) - Phillips

  • Royal Artillery (medium guns?) #1 5sp
  • Royal Artillery (medium guns?) #2 5sp
  • 20th Foot d3+2sp (4)
  • 63rd Foot d3+2sp (4)
"Cabins" (6)

  • Canadians 3sp, Militia

Optionally in the woods on the British right - Indians/Canadians 5sp OO.

Optionally in front of the Balcarres redoubt an outwork with a piquette of 1sp

(1) Could be combined as a single close order unit 5sp
(2) The exact German units involved is not clear in the sources I've checked so far, I've used the two regiments from my collection
(3) Just fortified at the front and side, nothing at the rear 200m long with 2 guns defenses commander by Colonel Breymann
(4) The exact strengths of the defenders is unclear and there is some mention of some losses due to troops being dispatched to assist the forces in the open. To determine the exact number. roll a d6 1,2 - 3sp; 3,4 - 4sp; 5,6 - 5sp
(5) A large substantial work with abbatis in front 500m long with 8 guns
(6) Just considered as cover (loop holed palisade)
(7) The artillery that marched out was 12 guns = 15 sp, rather than create 3 powerful full strength units I have shown them as 5 weaker 3sp units so they can be more accurately dispersed across the frontage. This also makes them less effective and better reflect their performance in the battle.
(8) Optional - Breyman was a tyrant and some sources suggest he was shot by his own men, so when he tests for "risk to general" add 2 to the die roll.
(9) Optional - Fraser was deliberately shot by one of Morgans riflemen while rallying his troops. To reflect his inspiring leadership he has a +2 morale bonus, but he tests for "risk to general" whenever any of the units under his command lose a casualty(sp) from rifle fire.

Will

Sunday 23 March 2008

Command & Control - Ideas (2)

I found the time to play test the rules a few days ago and found a number of problems. See the Battle of Greenford for details. While playing I made a number of tactical errors, which were based on playing the game assuming normal control. One factor may cause problems in offense.defense games is that it increases the time that the attackers spend under fire, especially artillery.

Firstly as mentioned by Steve it's quite slow. The idea was mainly to provide a mechanism to allow solo play. I also found that by allowing for the casualty effect meant that non-commanded units had it a bit too easy. The solution to both is to drop the casualty effect from the calculation. It's already covered in a sense by the morale and other factors, so it is probably overkill.

As expected sending troops into woods caused command/control problems as they often missed the required dice roll, even if they were just 2 lower. Using the commander was similarly a problem. I hadn't added this as a factor, but given they have to fall back to do so then the command distance is increased and the issue is adequately covered this way.

I will now use the following

+2 if the commander is with the unit (attached)
-1 Per 12" away from the commander
-2 If out of sight of the commander
+1 if a well trained unit
-1 if a poorly trained unit
-1 "group" move (several units belonging to the same commander moving together)
+1 if the CinC is within 6" of the commander (optional)

After all command rolls are completed any individual units that have not tested for command can test independently needing a 3 of lower be be able to move (still with +/-1 for training).

Saturday 8 March 2008

Rules available as Word document

A copy of the rules is now loded on esnips at link

Will

Saturday 16 February 2008

Spencer's Ordinary 26 June 1781 (2)

Some maps from the biography of John Grave Simcoe the commander of the Queens Rangers sahowing the progress of the action. It can be found online at link

There are also details in the Pictorial Field book of the Revolution at link and a copy of Simcoes own journal link

Spencer's Ordinary 26 June 1781 (1)

I'm a regular visitor to Giles Allison's blog Tarleton's Quarter and the latest update covers the action at Spencer's Tavern (or Ordinary) one of the small actions leading up to the seige at Yorktown. It's a very tempting small scale action and I'm tempted to buy the latest British Grenadier rules scenario book just for the scenarios.

The forces involved are quite small, but dominated by cavalry. From Greg Novaks book the AWI in the South:

Loyalists (Simcoe)
Queens Rangers Foot 240
Queens Rangers Horse 120
Hessian Jaegers 60
1 x 3pdr Light Gun
+ Cattle/Baggage being driven off

Patriots (Butler)
Macpherson Light Horse 120 * (mix of 1st Light Dragoons & Armand's Legion)
Virginia Rifles 120 *
Light Infantry 100
2nd Pennsylvannia 180
* 50 Doubled up with cavalry

Using a similar scaling to the BG scenario would give

Loyalists (Simcoe)
Queens Rangers 4 x 12 fig foot units (strength 5)
Queens Rangers Horse 6 x 4 fig cavalry units (5)
Hessian Jaegers 1 x 6 fig open order rifle unit (5)
Artillery 1 x Light gun (3)
+ Cattle/Baggage being driven off

Patriots (Butler)
Macpherson Light Horse 6 x 4 fig cavalry units (5) *
Virginia Rifles 2 x 6 fig open order rifle unit (5) *
Light Infantry 2 x 6 fig open order units (4)
2nd Pennsylvannia 3 x x 12 fig foot units (5)

* One rifle unit is considered to be doubled up with two cavalry units, The pair of cavaltry units must move together and suffer-3" move deduction and -1 on morale and melee while carrying the riflemen. It takes a full move to dimount the rifles and for both units to reform.

Saturday 26 January 2008

Command and Control - ideas (1)

The AWI rules as written were developed before many of the "recent" ideas on command and control were developed and I have been considering how to incorporate them particularly for use in solo games.

In DBx, I've always felt that the pip system was too arbitrary, even with the CinC's ability to switch dice between commanders, it just feels too abstract and doesn't model the individual commanders abilities.

Warmaster (WMA)uses a slower system, but it's more effective at representing different commanders abilities, however, it does allow units to make multiple moves, which can unbalance the game system.

Fire and Fury uses a system that is more unit command/morale driven, but also includes the strength/exhaustion of the unit.

My plan is to use the WMA system with dice rolls (2d6) per unit/group in the order selected by the commander with the following modifiers.

+2 if the commander is with the unit (attached)
-1 Per 12" away from the commander
-2 If out of sight of the commander
-1 If 1 or 2 strength points lost
-2 If 3 or more strength points lost
+1 if a well trained unit
-1 if a poorly trained unit
-1 "group" move (several units belonging to the same commander moving together)
+1 if the CinC is within 6" of the commander (optional)

For example a poor general would have a rating of 7. he attempts to give a command to a militia unit 15" away (-1) that has lost 1 strength point (-1), and as militia it is poorly trained (-1). So a the general needs a 4 or less on 2d6 to succeed. Therefore if the general rolls a 5 with 2d6 he fails to give the unit an order, and can give no more orders to troops under his command.

After all command rolls are completed any individual units that have not tested for command can test independently using a command rating of 6. They cannot use this test unless their commander has failed on another units under his command.

Will